今回の話は自分メモです。
VisualStudio2010でのWinアプリ開発やコンソールアプリ開発で、本来できない「ビルドタイプによるApp.configの動的書き換えを行おう」という話です。
現在のVisual Studio 2010 での開発では、Webアプリ開発だと Web.config を “Web.Debig.config” や “Web.Release.config” による変換処理(TransformWebConfig)を行う機能がデフォルトであります。これによりDebugとReleaseといったビルドタイプの違いによって、Web.configの設定値を動的に変換し、適切なWeb.configにするということが可能でした。
しかし、Winアプリ開発やコンソールアプリ開発では、Webアプリ開発でついていた変換処理のような機能はついておらず、アプリケーション開発者はRelease前にApp.configを書き換えてRelease処理を行う、もしくはRelease後にApp.configを書き換える必要がありました。
 Webアプリ開発では動的に書き換える機能がそなわっている
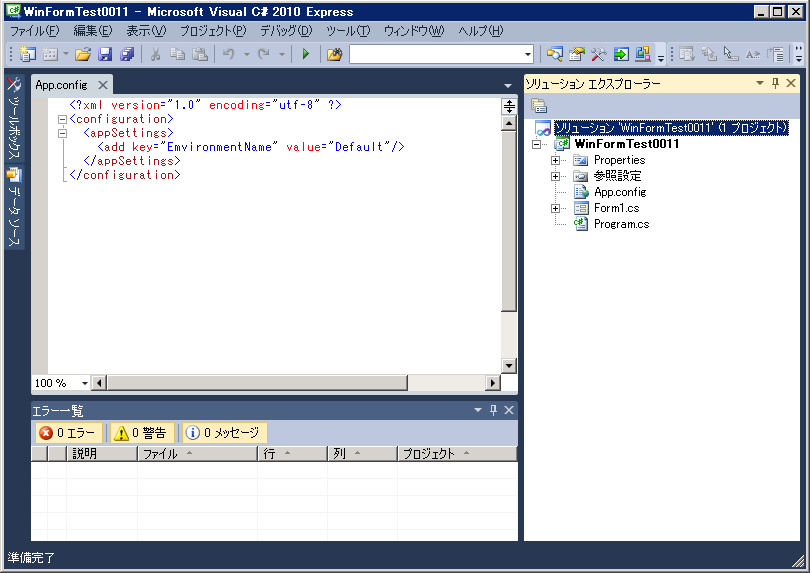 Windowsアプリ開発ではWebアプリ開発のような動的書き換えの機能はない
今回は、その問題をクリアするための方法です。
方法はいたって単純。いわゆるJavaで言うところのAntビルドのビルド設定ファイルを変更し、ビルド時に調整を施すだけです。
Antビルドでは、build.xmlを用いてビルド処理、およびjarファイルへのパッケージング処理を行っていました。
Visual Studio(.net Framework)では、ビルドをMSBuild.exeとプロジェクトファイル(xxx.csprojなど)を用いて行っています。Antビルドでのbuild.xmlと同じ役割をしているのがプロジェクトファイルになるわけです。
今回、Visual Studio 2010 Expressを用います。なお、今回の例ではC#で作成しています。VBの場合は適宜VBでのファイルに置き換えて考えてください。
参考にしたのは以下のサイトです。以下のサイトを参考に適宜変更・訂正しています。
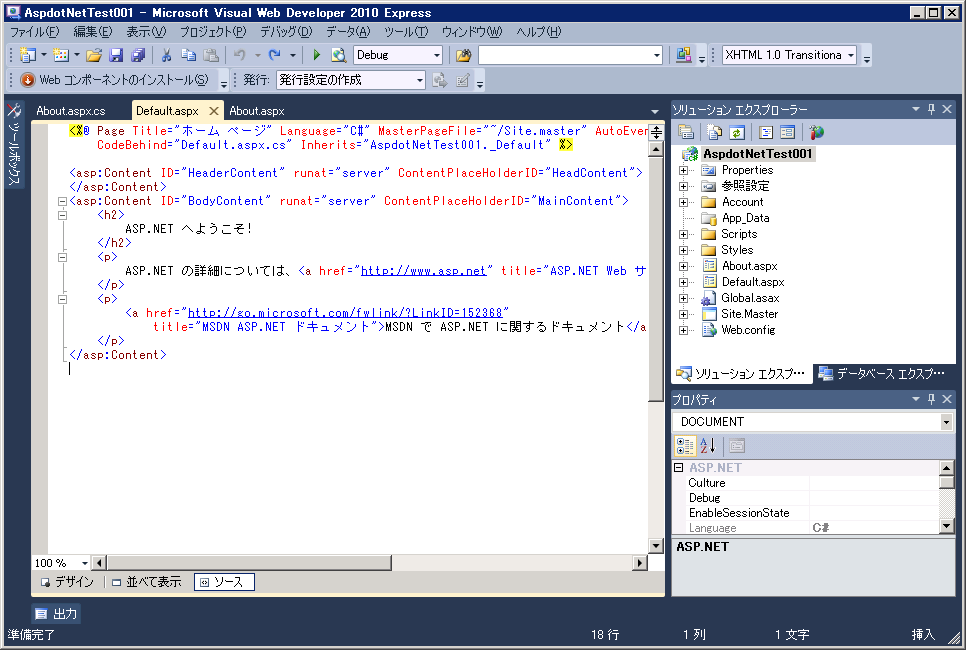
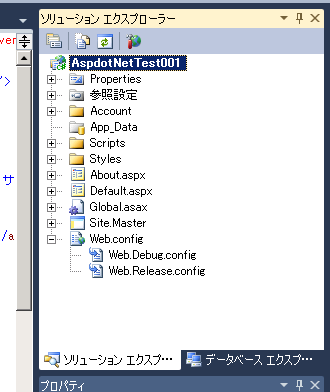
■1.App.Debug.config、App.Release.configの作成
まずはファイルの準備です。
App.config、App.Debug.config、App.Release.configを追加します。追加は以下のファイルを追加します。(ファイルは適宜変更してください)
動的変換される箇所は<add key="EmvironmentName" value="Default"/>の値です。
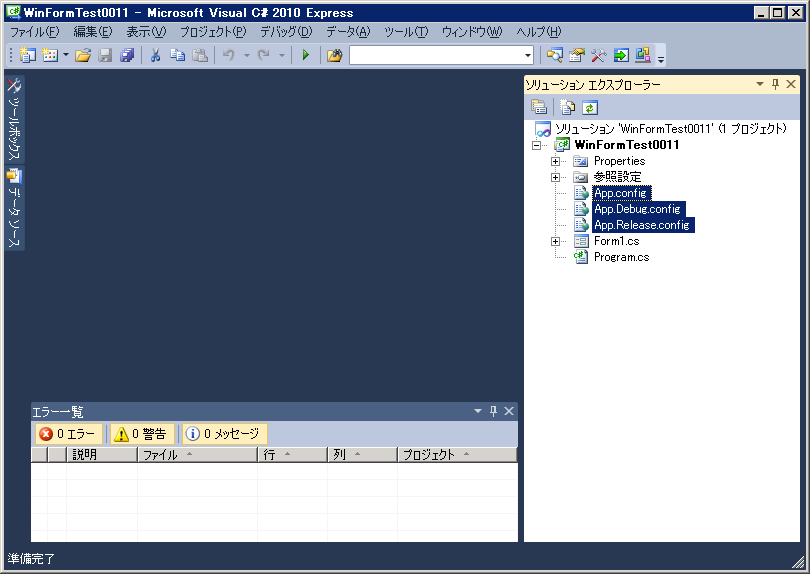 App.config、App.Debug.config、App.Release.configを追加
例.App.config
<?xml version="1.0" encoding="utf-8" ?>
<configuration>
<appSettings>
<add key="EmvironmentName" value="Default"/>
</appSettings>
</configuration>
例.App.Debug.config
<?xml version="1.0" encoding="utf-8" ?>
<configuration xmlns:xdt="http://schemas.microsoft.com/XML-Document-Transform">
<appSettings>
<add key="EmvironmentName" value="Debug" xdt:Transform="Replace" xdt:Locator="Match(key)"/>
</appSettings>
</configuration>
例.App.Release.config
<?xml version="1.0" encoding="utf-8" ?>
<configuration xmlns:xdt="http://schemas.microsoft.com/XML-Document-Transform">
<appSettings>
<add key="EmvironmentName" value="Release" xdt:Transform="Replace" xdt:Locator="Match(key)"/>
</appSettings>
</configuration>
■2.プロジェクトファイル(xxx.csproj)の変更
次にプロジェクトファイルを調整します。
Visual Studio 2010のStandard Edition以上のバージョンでは、プロジェクトをアンロードして書き換えることが可能ですが、Expressではそのような機能はないので、直接テキストエディタからプロジェクトファイルを書き換えます。(行う変更は同じで問題ありません)ちなみにちゃんと製品版を購入すれば、[プロジェクト]のコンテキストメニューから[ソリューションフォルダーのプロジェクトのアンロード]を選択することで編集することが可能です。
変更箇所は以下の4箇所です。
2.1.ProjectConfigFileName要素を追加する
ルートのProject要素のすぐ下にあるPropertyGroup要素に、ProjectConfigFileName要素を追加します。場所はPropertyGroup要素の中であればどこでもかまいません。
ProjectConfigFileName要素の値は、変更対象となる構成ファイル名を入れてください。今回の例だとApp.configです。以下のように変更します。
<PropertyGroup>
<Configuration Condition=" '$(Configuration)' == '' ">Debug</Configuration>
<Platform Condition=" '$(Platform)' == '' ">x86</Platform>
<ProductVersion>8.0.30703</ProductVersion>
<SchemaVersion>2.0</SchemaVersion>
<ProjectGuid>{A0519EDB-4B73-431F-986F-5E27F447FD45}</ProjectGuid>
<ProjectConfigFileName>App.config</ProjectConfigFileName>
2.2.ItemGroupの各構成ファイルの設定を変更する
ここでは構成ファイル(App.config)と追加したビルド用構成ファイル(App.Debug.config、App.Release.config)の、プロジェクト下での構成とビルドアクションの設定変更を行っています。ここでは、元の状態
<None Include="App.config" />
<None Include="App.Debug.config" />
<None Include="App.Release.config" />
を、以下のように変更します。
<Content Include="App.config" />
<None Include="App.Debug.config">
<DependentUpon>App.config</DependentUpon>
</None>
<None Include="App.Release.config">
<DependentUpon>App.config</DependentUpon>
</None>
軽く説明をすると、ここでの“None”や“Content”は、ビルド時にどのように扱われるかを示しています。
Noneとは、ビルド時に特に何も処理を施さないことを示しています。またContentとは、プロジェクトのビルド処理時にコンパイルはされないものの、ファイルとして発行されるか埋め込まれるファイルであることを示しています。今回、App.configはTransform処理を行うのでContentに変更、App.Debug.config、App.Release.configはそのままです。
またDependentUponは、他のファイルとの関連・依存を示します。今回の場合、App.Debug.configもApp.Release.configもApp.configに依存する形で構成されているので、この要素を追加しています。
2.3.Microsoft.WebApplication.targetsのImport
3つ目にImport要素の追加です。Microsoft.WebApplication.targetsというtargetsファイルをImportします。
<Import Project="$(MSBuildToolsPath)\Microsoft.CSharp.targets" />
を、以下のように変更します。
<Import Project="$(MSBuildToolsPath)\Microsoft.CSharp.targets" />
<Import Project="$(MSBuildExtensionsPath)\Microsoft\VisualStudio\v10.0\WebApplications\Microsoft.WebApplication.targets" />
狂言日誌さんでは“<Import Project="$(MSBuildExtensionsPath)\Microsoft\VisualStudio\v10.0\Web\Microsoft.Web.Publishing.targets" />”が必要だと書いていますが、何度か試しましたが必要ありませんでした。また今回のTransformWebConfigはMicrosoft.WebApplication.targetsに含まれる機能であるため、Microsoft.WebApplication.targetsの追加は必須です。
2.4.Target要素の追加
最後にTarget要素の追加です。プロジェクトファイルの一番下にある以下のコメントアウト
<!-- To modify your build process, add your task inside one of the targets below and uncomment it.
Other similar extension points exist, see Microsoft.Common.targets.
<Target Name="BeforeBuild">
</Target>
<Target Name="AfterBuild">
</Target>
-->
この記載の下に、以下の記載を追加します。
<Target Name="TransformAppConfig" AfterTargets="Build">
<CallTarget Targets="PreTransformAppConfig" />
<CallTarget Targets="TransformAppConfigCore" />
<CallTarget Targets="PostTransformAppConfig" />
</Target>
<Target Name="PreTransformAppConfig">
</Target>
<Target Name="TransformAppConfigCore">
<CallTarget Targets="TransformWebConfig" />
</Target>
<Target Name="PostTransformAppConfig">
<Copy Condition="Exists('$(TransformWebConfigIntermediateLocation)\transformed\App.config')" SourceFiles="$(TransformWebConfigIntermediateLocation)\transformed\App.config" DestinationFiles="$(OutputPath)\$(AssemblyName).exe.config" />
<Copy Condition="Exists('$(TransformWebConfigIntermediateLocation)\transformed\App.config') And Exists('$(OutputPath)\$(AssemblyName).vshost.exe')" SourceFiles="$(TransformWebConfigIntermediateLocation)\transformed\App.config" DestinationFiles="$(OutputPath)\$(AssemblyName).vshost.exe.config" />
</Target>
一番上のTarget要素が今回のトリガーとなるTarget要素です。この要素はBuild処理の後に呼び出されます。このTarget要素が呼ばれると、“PreTransformAppConfig”、“TransformAppConfigCore”、“PostTransformAppConfig”の3つのTarget要素が順に呼ばれます。
TransformAppConfigCoreでは本来呼ばれなかったらTransformWebConfigを呼び出します。この処理が、App.configの内容を動的に書き換えてくれます。
PostTransformAppConfigでは、書き換えられたApp.configを、ビルドファイルが配置されるディレクトリにRenameCopyしています。
PreTransformAppConfigについてはおまけです。
■3.Debugビルドの実行、Releaseビルドの実行
最後に、ファイルを保存し、実際にDebugビルドとReleaseビルドを実行してください。
以下のようになっていることが確認できます。
例.WinFormTest0011.exe.config(Debug時)
<?xml version="1.0" encoding="utf-8" ?>
<configuration>
<appSettings>
<add key="EmvironmentName" value="Debug"/>
</appSettings>
</configuration>
例.WinFormTest0011.exe.config(Release時)
<?xml version="1.0" encoding="utf-8" ?>
<configuration>
<appSettings>
<add key="EmvironmentName" value="Release"/>
</appSettings>
</configuration>
PR
![はてなブックマーク - [PR]](http://b.hatena.ne.jp/entry/image/http://yoppa.blog.shinobi.jp "はてなブックマーク - [PR]")
![livedoorクリップ - [PR]](http://image.clip.livedoor.com/counter/small/http://yoppa.blog.shinobi.jp "livedoorクリップ - [PR]")